
Replacing kitchen drawers might seem like a daunting task, but it’s a practical and rewarding DIY project that almost anyone can tackle. With the right tools, preparation, and step-by-step guidance, you can save money, enhance your kitchen aesthetics, and improve functionality without hiring a professional.
Why Replace Your Kitchen Drawers?
Replacing kitchen drawers isn’t just about fixing something broken—it’s about improving the overall look and usability of your kitchen. Let’s explore the key reasons why you might want to replace your kitchen drawers:
Common Reasons for Replacement
- Wear and Tear: Over time, drawers can become damaged from daily use. Broken slides, cracked wood, or warped materials can make them difficult to use.
- Outdated Style: If your kitchen feels stuck in a previous decade, replacing drawers can provide an instant facelift.
- Broken Functionality: Drawers that no longer glide smoothly or don’t close properly can be frustrating.
Functional Improvements
Replacing your kitchen drawers can also give you access to:
- Smoother Operation: Modern drawer slides ensure easy and quiet opening.
- Better Storage Options: Newer designs often include better-organized compartments and increased storage space.
Aesthetic Appeal
New drawers and hardware can transform the entire look of your kitchen. You can match them with your existing theme or go bold with an updated style.
Repair vs. Replacement
Sometimes, a drawer can be repaired with minimal effort—like replacing a single slide or tightening screws. However, if the drawer is extensively damaged or doesn’t fit your needs anymore, it’s time for a full replacement.
Tools and Materials Needed for Replacing Kitchen Drawers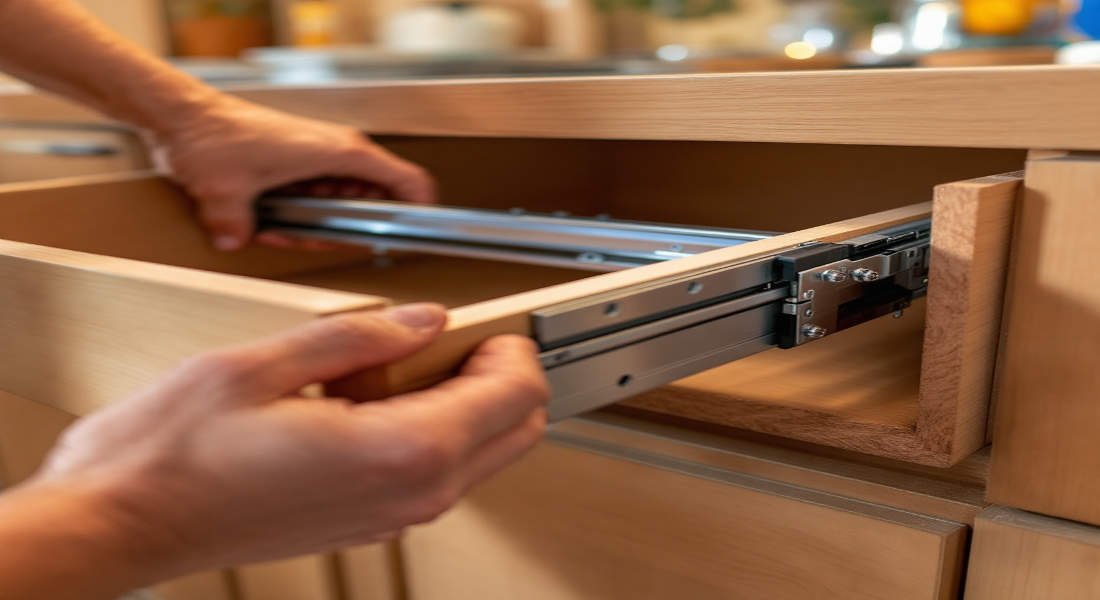
Before jumping into the project, gather all the tools and materials you’ll need. Being prepared will save you time and frustration.
Essential Tools
- Screwdriver (flathead and Phillips)
- Drill (with bits)
- Measuring Tape
- Pencil
- Pliers
Materials
- Replacement Drawer: Either pre-made or custom-built to match your space.
- Drawer Slides: Choose from side-mount, under-mount, or soft-close options.
- Screws: Ensure they’re the right size for your slides and cabinet.
- Adhesive or Caulk: For added stability if needed.
Optional Tools
- Pocket Hole Jig: Ideal for assembling custom drawers.
- Pin Nailer: Useful for securing drawer fronts.
Safety Equipment
- Gloves: To protect your hands from sharp edges.
- Safety Glasses: To prevent debris from getting into your eyes.
Step-by-Step Guide on How to Replace Home Kitchen Drawer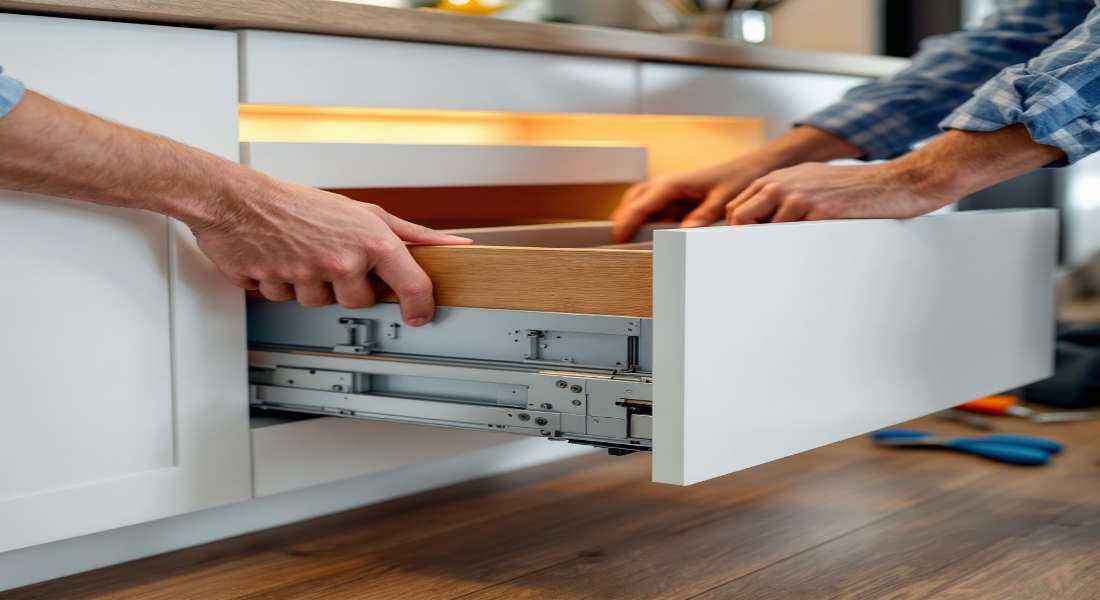
Replacing a kitchen drawer involves a few straightforward steps. Follow this guide carefully to ensure a smooth process.
You may also read (does a fire pit really increase your homes value).
Prepare and Measure
Proper preparation is key to a successful replacement.
- Inspect the Existing Drawer: Look for signs of damage or wear. Determine if you need to replace the entire drawer or just certain components like slides.
- Measure Accurately: Use a measuring tape to determine the width, height, and depth of the existing drawer and cabinet opening.
- Tip: Measure twice to avoid mistakes.
- Choose a Replacement: Based on your measurements, select a pre-made drawer or plan to build one yourself.
Remove the Old Drawer
Now that you’re prepared, it’s time to remove the old drawer safely.
- Empty the Drawer: Take out all items to prevent accidents.
- Detach the Drawer Slides: Use a screwdriver or drill to disconnect the slides from the cabinet.
- Clean the Cabinet Space: Remove any adhesive, dirt, or debris to ensure a clean surface for installation.
Install New Drawer Slides (If Needed)
Drawer slides are crucial for smooth operation. If your current slides are damaged, here’s how to replace them:
- Mark and Measure: Use a pencil to mark where the new slides will go inside the cabinet.
- Attach the Slides: Secure them with screws using a drill.
- Pro Tip: Ensure the slides are level to avoid alignment issues later.
Position and Install the New Drawer
With the slides in place, it’s time to install the new drawer.
- Place the Drawer: Align it carefully with the slides and push it into position.
- Secure the Drawer: Use screws to attach the drawer to the slides securely.
- Test the Fit: Ensure the drawer glides smoothly and sits evenly with the cabinet face.
Test and Adjust
The final step involves testing and making adjustments as needed.
- Check Alignment: Open and close the drawer several times to ensure proper alignment.
- Tighten Screws: If anything feels loose, tighten the screws gently.
- Clean Up: Wipe down the area and admire your work!
Tips for Choosing the Right Replacement Drawer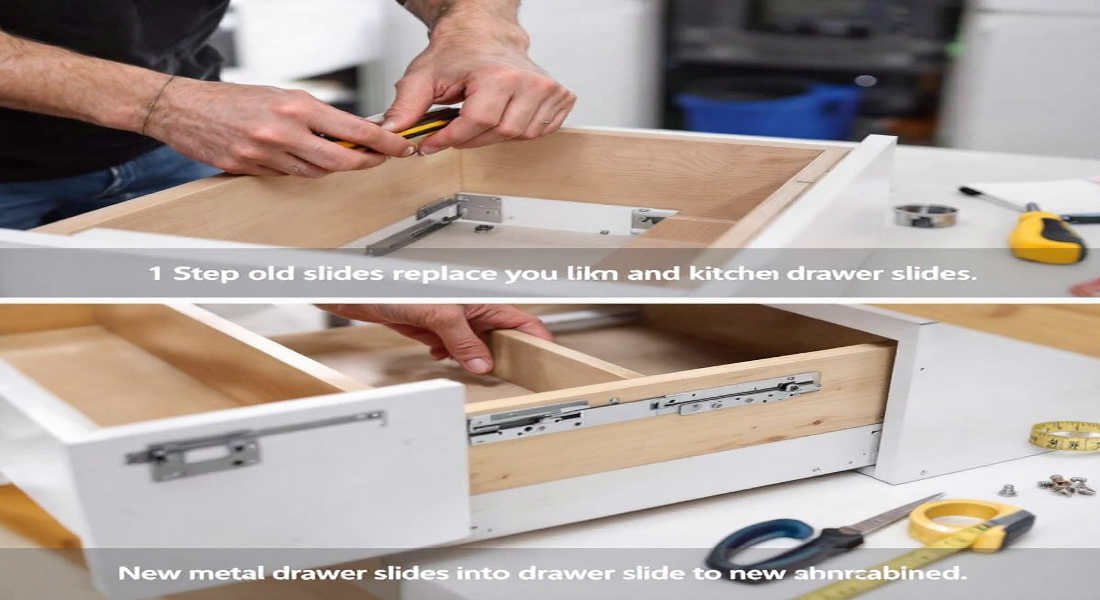
Picking the right drawer is essential for a successful replacement. Here are some tips:
- Match the Style: Ensure your new drawer matches the design of your existing kitchen.
- Material Matters: Choose durable materials like hardwood or high-quality MDF for longevity.
- Hardware Compatibility: Select drawer slides and handles that complement your kitchen’s look.
- Shop Smart: Check local hardware stores, custom builders, or online retailers for options.
Common Mistakes to Avoid When Replacing Kitchen Drawers
Avoid these pitfalls to save time and effort:
- Incorrect Measurements: Always double-check measurements to ensure a perfect fit.
- Using the Wrong Slides: Ensure you choose slides that match your drawer type.
- Over-Tightening Screws: This can damage the wood or misalign the drawer.
- Skipping the Alignment Check: Misaligned drawers can be frustrating to use.
Benefits of DIY Kitchen Drawer Replacement vs. Hiring a Professional
Thinking about whether to DIY or hire a pro? Here’s a quick comparison:
DIY ReplacementHiring a Professional
Cost-effective and budget-friendly Convenient but more expensive
Learn valuable home improvement skills Professional quality and precision
Flexible timing Limited by contractor availability
For simple replacements, DIY is often the best choice. However, if your kitchen involves complex cabinetry or electrical components, hiring a professional might be worth considering.
Maintenance Tips to Keep Your Kitchen Drawers Functioning Smoothly
To extend the life of your new kitchen drawers:
- Clean Regularly: Wipe down drawers and slides to prevent dirt buildup.
- Lubricate Slides: Use a silicone-based lubricant to keep them gliding smoothly.
- Avoid Overloading: Too much weight can strain the drawer and slides.
You may also read (home cleanout for your sink).