
Cutting copper pipes is a common DIY task that many homeowners encounter, especially when tackling plumbing repairs or renovations. Whether you’re installing a new sink, fixing a leak, or adjusting your home’s plumbing layout, knowing how to cut house copper pipe properly is essential. Proper cutting not only ensures a clean edge but also helps maintain the integrity of your plumbing system, reducing the risk of leaks and other issues.
Understanding Copper Pipes in Your House
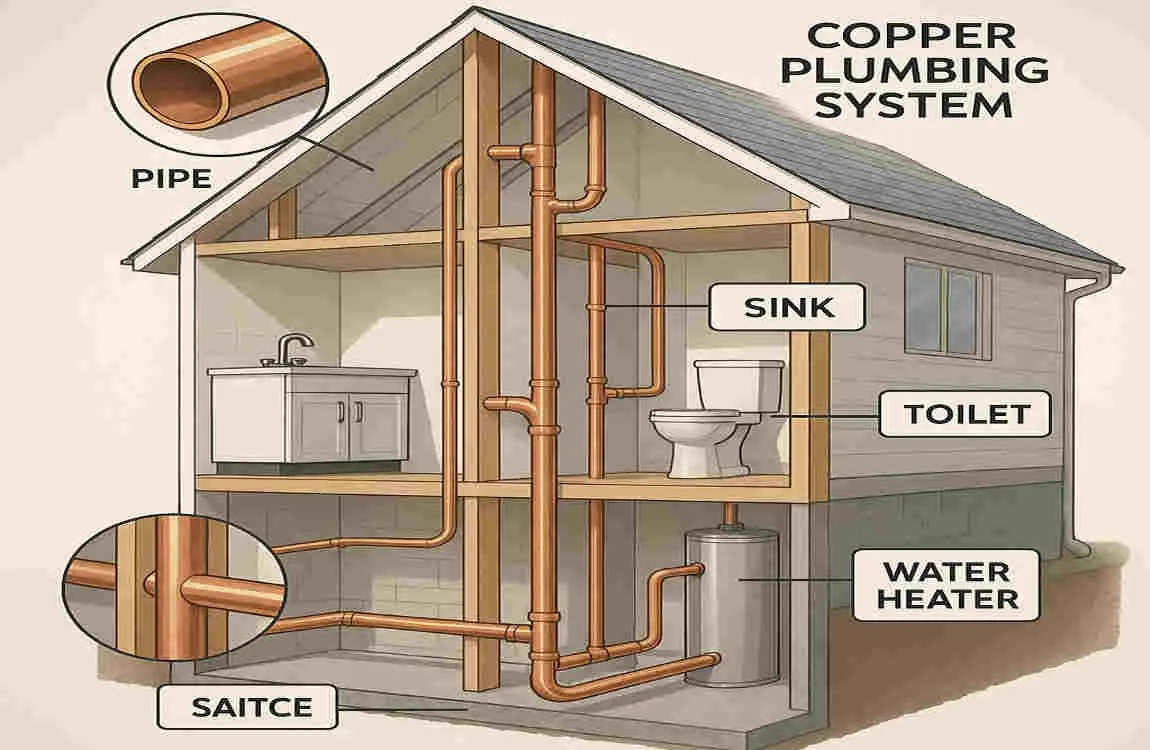
Copper pipes are a staple in residential plumbing systems, and understanding their types and uses can significantly enhance your DIY plumbing skills.
Types of Copper Pipes
There are three main types of copper pipes used in homes:
- Type K: This type has the thickest walls and is used for underground water supply lines and other applications requiring durability.
- Type L: With medium thickness, Type L is commonly used for interior plumbing and is suitable for most residential applications.
- Type M: This type has the thinnest walls and is primarily used for lighter applications such as water supply lines in areas where pressure is not a significant concern.
Typical Uses of Copper Pipes
Copper pipes are utilized in various applications within residential plumbing, including:
- Water Supply Lines: Distributing potable water throughout the home.
- Heating Systems: Used in radiant heating systems due to their excellent thermal conductivity.
- Refrigeration Lines: Connecting various components in refrigeration systems.
Why Copper Pipes Are Favored
Copper pipes are popular for several reasons:
- Durability: They can last for decades without degrading.
- Corrosion Resistance: Copper resists rust and corrosion, making it a reliable choice for plumbing.
- Ease of Installation: Copper pipes can be easily joined using soldering or compression fittings.
Understanding these aspects of copper pipes will help you appreciate the importance of proper cutting techniques, ensuring that your plumbing system remains intact and functional.
Tools Needed to Cut Copper Pipes
Before you start cutting, having the right tools is crucial. Here’s a comprehensive list of tools you’ll need:
Pipe Cutting Tools
You may also read (do house kitchen sinks come with drains included).
- Pipe Cutters (Manual Rotary Cutters)
- Pros: Provides clean, precise cuts and is easy to use.
- Cons: May not work well in tight spaces.
- Hacksaws
- Pros: Versatile and can be used for other materials.
- Cons: Requires more effort and can produce rough cuts.
- Tubing Cutters
- Pros: Designed specifically for tubing, ensuring smooth cuts.
- Cons: Can be expensive and bulky.
- Power Tools (e.g., Angle Grinders)
- Pros: Fast cutting speed.
- Cons: Risk of damaging the pipe if not used carefully.
Additional Equipment
- Deburring Tools: For cleaning edges post-cutting.
- Sandpaper: Useful for smoothing rough edges.
- Measuring Tape: Accurate measurement is essential.
- Marker: For marking cutting lines clearly.
Safety Equipment Recommendations
Safety should always be your top priority. Here are some essential safety items:
- Gloves: To protect your hands from sharp edges.
- Safety Glasses: To shield your eyes from metal shavings.
Having the right tools and safety gear will set you up for a successful cutting experience.
Preparing to Cut Copper Pipes
Preparation is key to a smooth cutting process. Here are the steps you should follow:
Steps to Prepare
- Shutting Off Water Supply: Always turn off the main water supply to prevent leaks.
- Draining Water from Pipes: Open faucets to drain any remaining water from the pipes.
- Marking the Cutting Line: Use a marker or pencil to clearly indicate where you plan to cut.
- Ensuring Proper Workspace and Lighting: A well-lit, organized workspace makes cutting easier and safer.
Importance of Measuring Twice
Remember the adage, “measure twice, cut once.” Taking the time to ensure accurate measurements can save you from making mistakes that lead to wasted materials and time.
Step-by-Step Guide: How to Cut House Copper Pipe Properly
Now that you’re prepared, let’s dive into the detailed steps for cutting copper pipes.
Measure and Mark the Pipe
Accurate measuring and marking are crucial. Use your measuring tape to determine where you need to cut. Mark the pipe clearly to avoid confusion.
Secure the Pipe
Before cutting, ensure the pipe is securely in place. You can use a pipe vise or clamp to hold it in place, preventing movement that can lead to uneven cuts.
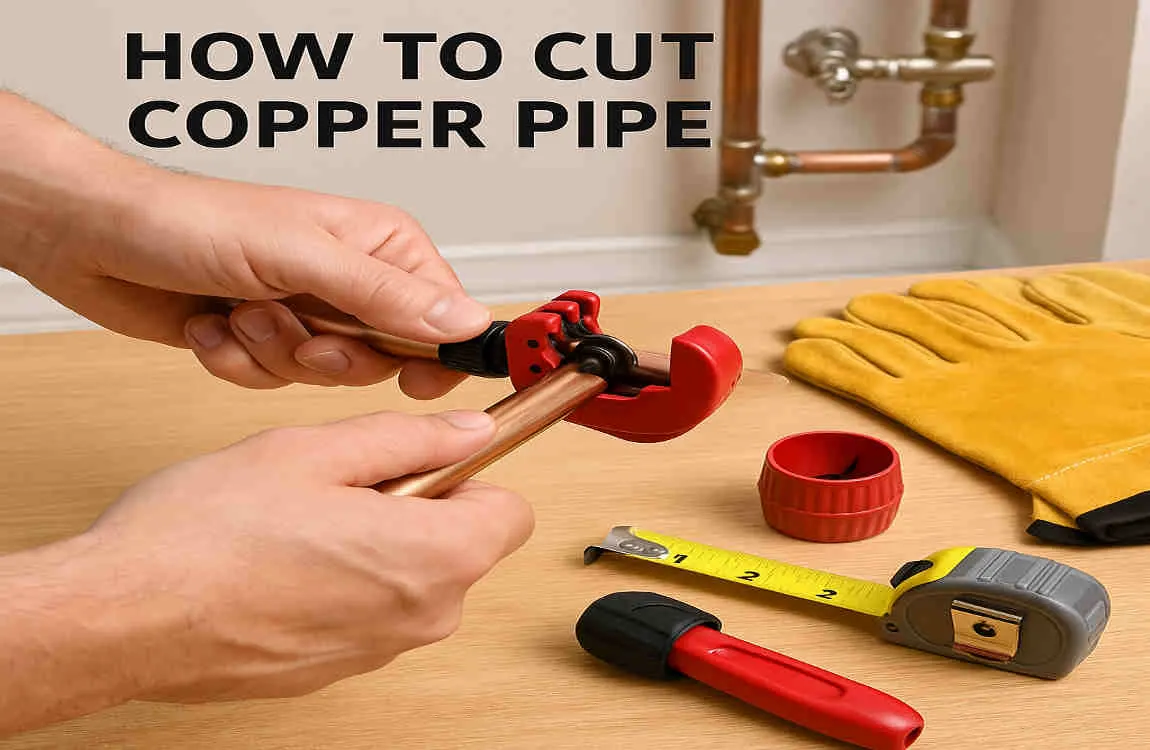
Cutting with a Pipe Cutter
- Position the Cutter: Place the pipe cutter around the marked section of the pipe.
- Tighten the Cutter: Slowly tighten the cutter until it grips the pipe firmly.
- Rotate the Cutter: Turn the cutter around the pipe, applying even pressure. Repeat the tightening of the cutter after each rotation until the pipe is completely cut through.
Alternative Cutting Methods
If you choose to use a hacksaw or a power tool, follow these guidelines:
Using a Hacksaw
- Hold the saw firmly and make slow, steady strokes.
- Keep the saw straight to ensure an even cut.
Using Power Tools
- Use a cutting wheel attachment and ensure you have a firm grip on it.
- Work carefully to prevent overheating and damage to the pipe.
Deburring and Smoothing the Cut Edge
You may also read (7 best neighborhoods for houses in quezon city).
After cutting, use a deburring tool or sandpaper to smooth the edges of the pipe. This step is crucial as it helps ensure a good fit for fittings and prevents damage to seals.
Common Mistakes to Avoid When Cutting Copper Pipes
While cutting copper pipes can be straightforward, several common mistakes can lead to issues:
- Cutting at an Angle: Always ensure your cuts are straight to avoid complications.
- Not Deburring Edges: Neglecting this step can lead to leaks.
- Rushing the Process: Take your time to ensure precision.
- Not Securing Pipes Properly: Unstable pipes can lead to uneven cuts.
- Improper Tool Choice: Ensure you use the right tool for the pipe’s diameter.
Avoiding these mistakes will improve the quality of your work and reduce the risk of plumbing issues.
Tips for Maintaining Copper Pipes After Cutting
Once you’ve cut your copper pipes, it’s essential to maintain them properly. Here are some tips:
- Attaching Fittings: Use soldering or compression fittings to securely connect new sections.
- Inspecting for Leaks: After installation, check for leaks by slowly turning the water back on.
- Best Practices for Longevity: Regularly inspect your plumbing for signs of wear or corrosion to ensure longevity.
When to Call a Professional Plumber Instead
While many cutting tasks can be done at home, there are situations where it’s best to call in a professional:
- Complex Installations: If your plumbing layout is complicated, professionals can ensure that everything is installed correctly and efficiently.
- Risk of Damage: If you’re uncomfortable with cutting and fitting, it may lead to costly mistakes.
- Finding a Qualified Plumber: Look for licensed professionals with good reviews to ensure quality work.
You may also read (a guide to selecting snake sizes for home drains).