
Maintaining your kitchen floor is about more than aesthetics— functionality, hygiene, and durability. Over time, the grout between your tiles can become discolored, cracked, or damaged due to constant foot traffic, spills, and moisture exposure. This can make your kitchen look untidy and lead to deeper issues like water damage or mold growth.
So, what’s the solution? Regrouting your kitchen floor! This process involves removing the old, worn-out grout and replacing it with fresh grout, breathing new life into your tiles and protecting your floor long-term.
But a big question that often comes up is: How much does it cost to regrout a home kitchen floor? Whether planning to tackle this as a DIY project or hire a professional, understanding the costs involved is essential for budgeting.
What is Regrouting? Understanding the Basics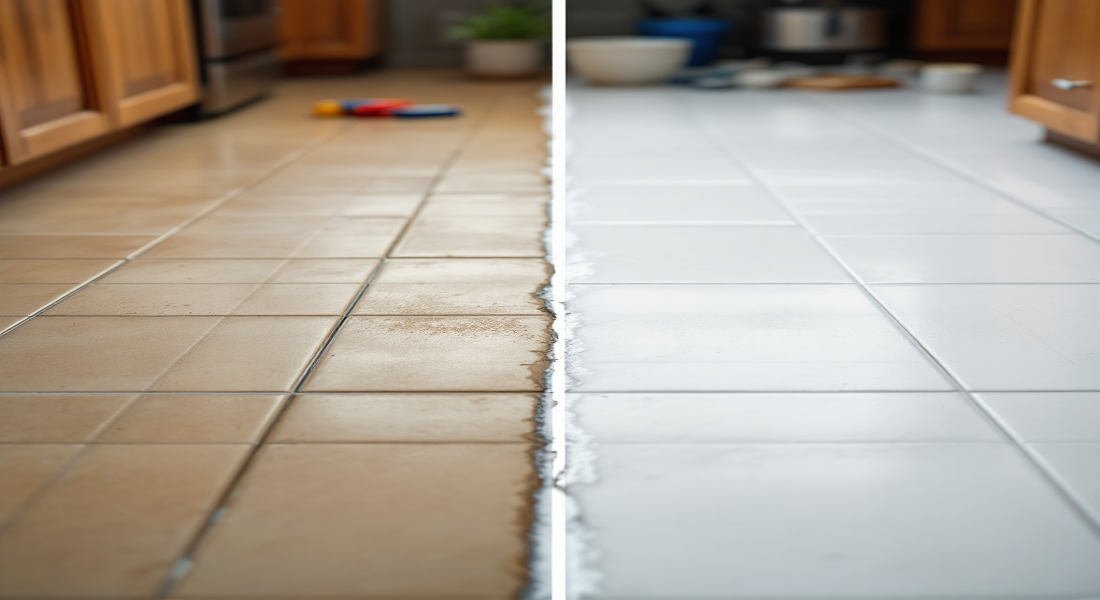
What is grout, and why does it matter?
Grout is the material used to fill the spaces between tiles, holding them in place and providing a finished, polished look. It also prevents dirt, water, and debris from seeping underneath the tiles, which could cause long-term damage to the flooring.
However, grout is porous and prone to wear and tear, especially in high-traffic areas like kitchens. Over time, it can crack, discolor, or even harbor mold and bacteria if not appropriately maintained.
Common issues with grout
- Cracking: This can occur due to shifting tiles or heavy use.
- Discoloration: Grout often absorbs stains from spilled liquids or food.
- Mold and mildew: Moist environments, like kitchens, can lead to fungal growth.
- Water damage: Compromised grout can allow water to seep under tiles, damaging the subfloor.
Benefits of regrouting your kitchen floor
Regrouting offers several advantages:
- Improved aesthetics: Fresh grout makes your tiles look new.
- Enhanced durability: It strengthens the bond between tiles and prevents further damage.
- Better hygiene: Removing old, moldy grout ensures a cleaner space.
Regrouting vs. replacing tiles
Regrouting is much less expensive and invasive than replacing the entire tile floor. Regrouting is the perfect solution if your tiles are in good condition, but the grout is failing.
When to Regrout Your Kitchen Floor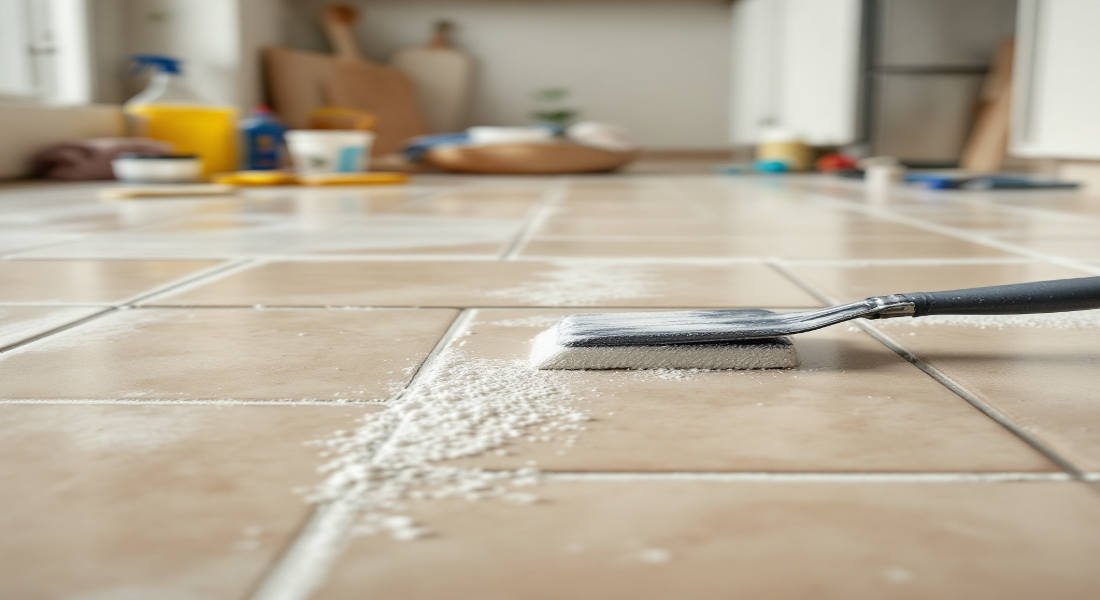
Signs it’s time to regrout
Does your floor need regrouting? Look out for these signs:
You may also read (top flooring materials).
- Visible cracks or gaps in the grout
- Persistent stains or discoloration
- Loose or shifting tiles
- Mold or mildew growth
- Water damage (e.g., damp spots or warping)
How often should you regrout?
The frequency of regrouting depends on the quality of the original grout and the level of wear and tear. On average, grout lasts about 8 to 15 years. Regular cleaning and sealing can extend its lifespan, but heavy use in a kitchen may shorten it.
Risks of delaying regrouting
Delaying necessary regrouting can lead to:
- Water damage to the subfloor
- Mold and mildew growth
- Higher costs if tiles need to be replaced later
Step-by-Step Guide to Regrouting Your Kitchen Floor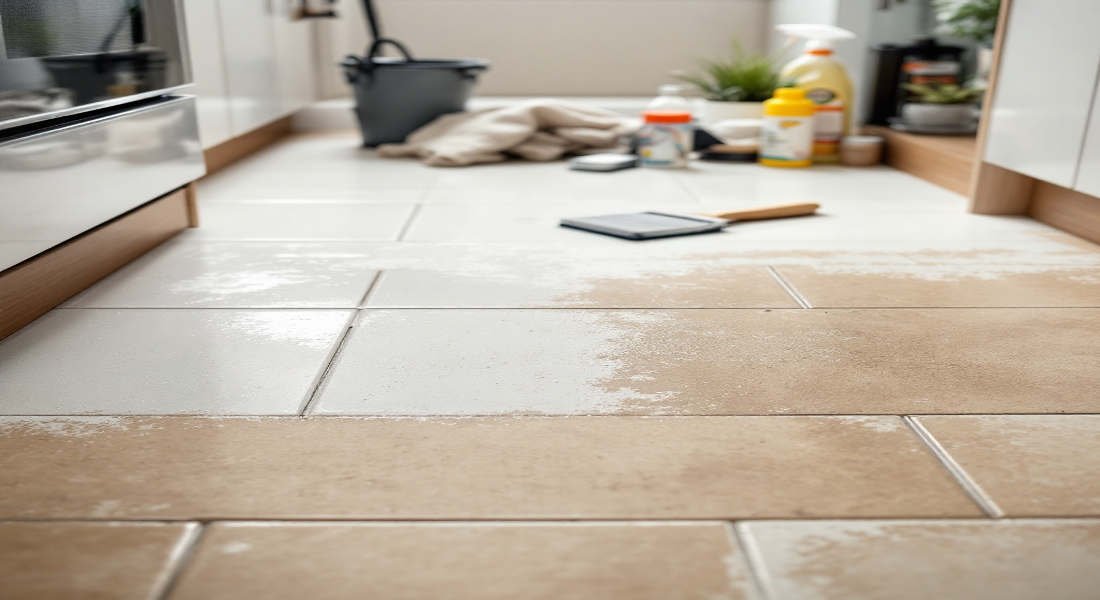
Preparation
Before starting, gather the following tools and materials:
- Grout saw or multi-tool
- Grout float
- Sponge and bucket
- New grout (sanded, unsanded, or epoxy)
- Grout sealant
- Cleaning supplies
Safety tips:
- Wear protective gloves and goggles.
- Ensure proper ventilation if using chemical cleaners.
Start by assessing the condition of your grout and measuring the area to determine how much grout you’ll need.
Removing Old Grout
To remove old grout:
- Use a grout saw or a power tool designed for grout removal.
- Carefully scrape away the grout without damaging the tiles.
- Remove all loose debris and vacuum the gaps.
Pro tip: Work slowly to avoid chipping the tiles.
Cleaning and Preparing the Surface
Thoroughly clean the tile gaps to ensure a proper bond with the new grout. Use a damp cloth or a vacuum to remove dust and dirt. Allow the surface to dry completely before moving on.
Mixing and Applying New Grout
Types of grout:
- Sanded grout: Best for wide gaps (over 1/8 inch).
- Unsanded grout: Ideal for narrow gaps.
- Epoxy grout: High durability and stain resistance, but more expensive.
Steps to apply grout:
- Mix the grout according to the manufacturer’s instructions.
- Use a grout float to press the grout into the gaps, holding it at a 45-degree angle.
- Wipe away excess grout with a damp sponge.
Cleaning Excess Grout and Finishing Touches
Once the grout starts setting, clean the tiles with a damp sponge to remove haze. Allow the grout to cure for at least 24-48 hours before applying a sealant.
Don’t skip the sealant! It protects the grout from moisture and stains.
Post-Regrouting Care
Wait at least 48-72 hours before using the floor typically. To keep your grout in good condition:
- Clean spills immediately.
- Use a pH-neutral cleaner for regular maintenance.
- Reapply sealant every few years.
How Much Does It Cost to Regrout a Home Kitchen Floor?
Factors Affecting Cost
Several factors influence the cost:
You may also read (can you paint home kitchen floor tile white).
- Size of the kitchen floor: Larger areas require more grout and labor.
- Type of grout: Epoxy grout is more expensive than sanded or unsanded.
- Labor costs: Professional rates vary by location.
- DIY vs. professional: Doing it yourself saves money but requires time and effort.
Average Cost Estimates
Cost ComponentPrice Range
Grout (per sq ft) $1 – $2
Professional labor (hourly) $50 – $100
Total cost (50-150 sq ft) $1,000 – $3,300 (average)
DIY vs. Hiring Professionals
FactorDIYProfessional
Cost Lower (materials only) Higher (labor + materials)
Skill level required: Moderate to high. Minimal effort required
Time Longer Faster
Tips to Save Money on Regrouting
- Choose durable grout types to minimize future repairs.
- Shop around for contractor quotes to get the best deal.
- Consider partial regrouting for heavily damaged areas.
Common Mistakes to Avoid
- Using the wrong grout type
- Not removing old grout completely
- Skipping the sealant step
- Rushing the drying process
You may also read (Home Kitchen Faucet Thread Sizes).